www.decordirect.co.za is a FREE online decor magazine offering interior decorating ideas and inspiration to the South African home owner. Including a FREE online garagesale, DIY tips, interior decorators and designers.
Total Pageviews
Wednesday, 16 January 2013
Kitchen ideas
Blend pared-down shaker style with modern assets. It's easy to update the shaker look because its simplicity makes it a natural partner for clean, modern lines. Despite being obviously modern in style, this room still owes its roots to the shaker tradition, with framed doors and wood worktops. The hi-tech stainless steel cooker and hood make a dramatic focal point and contemporary metal handles replace the traditional round wooden knobs. The white floor tiles make the room feel clean and bright, while laying them 'brick style', in staggered rows, gives a less formal effect.
If you have room, even a small island is an invaluable addition to the kitchen. make sure the worktop on it is a minimum of 15cm wider than the base unit and you can use it as a breakfast bar as well as a handy preparation surface. Cupboards underneath, extra big pots and the hanging rack above maximize storage - an important factor in Shaker homes.
Monday, 14 January 2013
Kitchen decor ideas: The natural touch
Mix cream with earthy greens, browns and yellows for a calm, relaxing kitchen.Shaker kitchens work beautifully with natural colours: cream panelled units, wooden worktops and a terracotta floor. The walls, in shades of cream, increase the sense of space, and the tiled splashback brings in beautifully toning shades of moss, lichen, cream and butter. A central island houses a deep sink with a swan-knecked tap and plenty of worksurface. The worktop for the other half of the kitchen is granite-look laminate which provides an interesting contrast. A freestanding butcher's block against the far wall is wonderfully practical, with a hanging rail of utensils, a shelf for spices, rack for knives, plus preparation space, which you can wheel to where you want it. There has been no attempt to hide away the kitchen appliances - some white, some stainless steel - yet nothing looks out of place in this relaxed and welcoming kitchen.
Tuesday, 27 November 2012
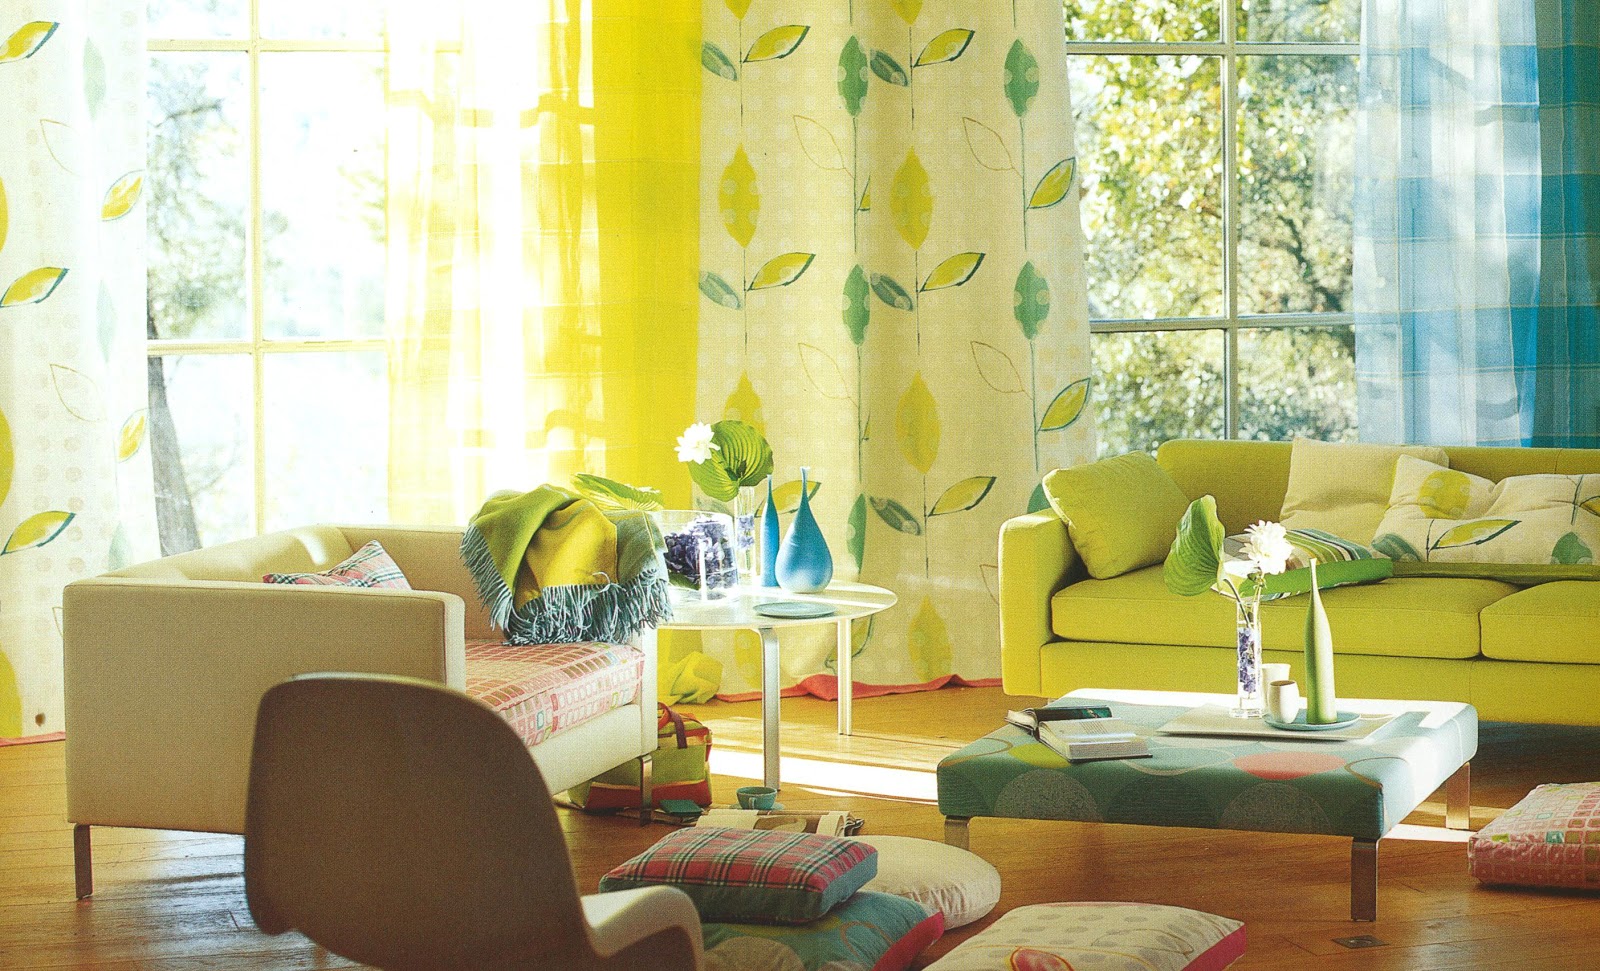
Decor Inspiration: Dappled sunshine & citrus shades
This is a modern house in the country, and you can really feel the sunshine streaming into this space with its bright citrus shades and leafy patterns. The predominant colour is lime green, accompanied by an interesting mix of turquiouse, pale blues, fresh greens and touches of pink. The hard lines of the architecture have been softened by the leaf print at the window - a reference to the trees outside, and the treanslucent checks in lime and turquoise filter the light and accentuate its sunny, dappled quality. But the geometry of square-paned windows is too strong to be ignored - it has been picked up in the contemporary prints on the armchair, cushions and ottoman.
"The colours here are harmonious and well-balanced - adding another shade would break the spell. A chalky softshade of pink on cushions, floor cushions and on the ottoman print stimulates the other colours, rather than clashing. And lots of white prevents the scheme from cloying. Even the flowers - some luminous creamy dahlias from the garden - are almost exclusively white." Trica Guild
Wednesday, 17 October 2012
How to create a Cork notice board for your kitchen.
1. Smooth off all the cut ends of the pine with sandpaper. Glue the wood to a non-shiney side of hardboard, to form a frame. Leave to dry, then pin in place from reverse side.
2. Stain the wood, following the manufacturer's instructions.
3. Working on a small area at a time, spread thin layer of wood glue onto hardboard and arrange the corks. Use a craft knife to cut the corks to fit where necessary. Screw the hanging plates into place on the back of the frame.
You will need: 4 lengths of planed pine (48 x 7cm), fine-grade sandpaper, 55cm square of hardboard, wood glue, 16mm hardboard pins, hammer, wood dye or stain, paintbrush or lint-free cloth for applying stain, about 170-180 corks, craft knife, 2 plate with screws for hanging board and a screwdriver.
Time needed: 2 hours
How to create a Sponge stamp splashback for your kitchen.
1. Paint white emulsion in a band to form a splashback a little wider than twice the width of a foam square.
2. Using two or three real leaves as templates, draw a leaf shap on each foam square and cut out.
3. Pour the ochre, brown and terracotta paints into three separate saucers. Roller ochre paint on to the first squares and press on to white splashback area at the bottom edge. Roller brown paint on to the second square and press on to the splashback next to the first. Do the same withe the terracotta paint. Repeat until you have two rows of alternating leaf squares.
You will need: emulsion paint in white, ochre, brown and terracotta, paintbrush, two or three types of leaf, felt pen, three squares of thin foam, craft knife, cutting mat, three saucers and small paint roller.
Time needed: 2 hours
Wednesday, 3 October 2012
Colourful Kitchens
Who said kitchens should be white or wood? Make colour the defining feature of your kitchen and create a room with real personality. Use the walls, floor and units to form dramatic blocks of colour. Choose a different shade for each one and keep all the other elements in the kitchen white or steel to avoid turning a bold scheme into discordant jumble of colours.
Go for a colourful kitchen if you enjoy setting your own mark on your home. A colourfull kitchen is the chance to be a bit quirky and have fun with a them, perhaps giving the room retro touches, or repeating bright motifs. This is a relaxed look that can bring warmth and life, particularly to small kitchens.
Country Cottage
Traditional florals, charmingly mismatched china and lots of natural wood make this welcoming look.Fresh Spring green teamed with white walls and wood provides a simple canvas ready to dress up with pretty country details.
Wood worktops are first choice for a country kitchen. Choose laminate for practically, but if you go for real wood, make sure it's naturallly moisture resistant wood like Teak or Iroko. Keep it well oiled and it will last for years. The deep sink with swan-knecked tap is a lovely period detail but with a practical purpose - it's great or washing up huge pots and grill trays. The swathe of floral fabric at the window is an easy way to disguise the fact that the window is modern.
Little details make the difference in a kitchen like this, like the old-fashioned drying rack, useful where there is little space, and the topiary tree on the windowsill that picks up the stencilled doors.
Subscribe to:
Posts (Atom)