Spread bonding agent on the area of the vase you want to cover with silver leaf. Leave for around 15 minutes, or according to the manufacturer's instructions. Lay the silver leaf on the glue and brush off excess with a dry paintbrush. When you are happy with the covering, coat the silver leaf with shellac for durability.
You will need: plain vase, silver leaf kit, small dry paintbrush, shellac (if not supplied with kit).
Time needed: 30 minutes
For more decor ideas visit decordirect
www.decordirect.co.za is a FREE online decor magazine offering interior decorating ideas and inspiration to the South African home owner. Including a FREE online garagesale, DIY tips, interior decorators and designers.
Total Pageviews
Monday, 26 March 2012
DIY decor ideas: Ornate mirror frame
You can use a new or old mirror for this project. If possible, remove the mirror from its frame. If it won't come out, cover the mirrored surface with masking tape. Clean the frame of the mirror to ensure it is free of any grease and dirt and place it on some newspaper. Shake the paint can well and spray the frame with even strokes. For best results, follow the manufacturer's instructions carefully and keep an even distance from the frame when spraying. Leave the frame to dry before replacing it or removing the masking tape from the mirror and hanging it on the wall.
You will need: mirror and frame, newspaper, masking tape, silver or chrome spray paint.
Time needed: 30 minutes plus drying
For more decor ideas visit decordirect
You will need: mirror and frame, newspaper, masking tape, silver or chrome spray paint.
Time needed: 30 minutes plus drying
For more decor ideas visit decordirect
Monday, 12 March 2012
Freestanding drawer unit
Remove existing handles and prepare the chest for painting by sanding off all the old paint and cleaning with white spirit. Paint the chest all over with two coats of emulsion and leave to dry. Use fine-grade sandpaper to rub back paint on the edges and corners of the chest to give it a distressed look. Remove the front of the top drawer or, if your chest cannot be taken apart like this, remove the drawer altogether. Put baskets in the top drawer and fix the oyster shell handles on to the lower drawers.
You will need: screwdriver, sandpaer in medium and fine grades, white spirit, cloth, off-white emulsion paint, paintbrush, wicker baskets, brass oyster shell handles.
Time needed: 2 hours plus drying
You will need: screwdriver, sandpaer in medium and fine grades, white spirit, cloth, off-white emulsion paint, paintbrush, wicker baskets, brass oyster shell handles.
Time needed: 2 hours plus drying
Thursday, 1 March 2012
Decor DIY: Bathroom wall stamps
Draw horizontal lines on the wall using a ruler, pencil and spirit level, and mark out equal spaces where you want the squares to be. Use a piece of sponge to make the stamp. Drw a square on the sponge with a felt-tip pen and cut out the shape carefully using scalpel. Pour a little of the silver paint on to a plate and dip the sponge into the paint. Practise stamping squares on a spare sheet of paper until you get the hang of the amount of paint and pressure you need. Then stamp squares on to the wall in the positions you have marked. Leave to dry.
You will need: ruler, pencil, spirit level, sponge, felt-tip pen, scalpel, silver paint, plate, scrap paper.
Time needed: 2 hours plus drying
You will need: ruler, pencil, spirit level, sponge, felt-tip pen, scalpel, silver paint, plate, scrap paper.
Time needed: 2 hours plus drying
Tuesday, 28 February 2012
DIY decor for your bathroom: Silver wall tiles
Make sure the area you are going to tile is level, clean and free of grease. Apply the tiles to the wall with tile adhesive, starting in the bottom-left corner. Work along the bottom row, placing tile spacers between the tiles. Once you have tiles the first line, use a spirit level to check the tiles are straight and even. Repeat the process until you have covered the area you are tiling. If your tiles don't fit exactly you will need to cut them to size using a tile cutter.
Leave the tile adhesive to dry for 24 hours, then remove the tile spacers and apply grout, carefully working on one tile at a time. Wipe over the tiles with a damp cloth to remove any excess grout and leave to dry.
You will need: sandpaper, water-resistant tile adhesive, silver or aluminium tiles, tile spacers, spirit level, tile cutter, tile grout, clean-damp cloth.
Time needed: 30 minutes plus drying
DIY Decor: Crackle-glazed kitchen doors
Remove doors, sand down thoroughly and wipe with white spirit to remove fine dust and any residual grease. Paint with two coats of your chosen base colour. When dry, apply the crackle glaze with a paintbrush and leave according to manufacturer's instructions - usually around half an hour. Paint on your chosen top coat in even brush strokes and leave. As it dries, the crackling will occur - do not brush after the crackling begins.
What you will need: screwdriver, sandpaper, white spirit, 2 coordinating emulsion colours, crackle glaze kit, paintbrush.
Time needed: 1 and a half hours plus drying
What you will need: screwdriver, sandpaper, white spirit, 2 coordinating emulsion colours, crackle glaze kit, paintbrush.
Time needed: 1 and a half hours plus drying
Friday, 10 February 2012
Planning & decorating your bathroom - An introduction
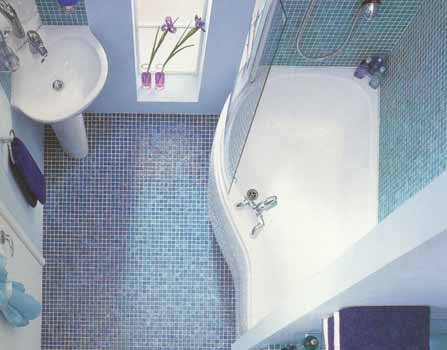
The bathroom can often be overlooked when it comes to planning and decoration, yet it is a space that is used on a daily basis by the whole family - for getting ready for the day, having a relaxing soak in the bath or perhaps an invigorating and refreshing shower. A bathroom should offer and opportunity for relaxation and tranquility, so it needs to be a private and peaceful environment for everyone to enjoy.Planning
Careful planning and research are the key factors in creating a bathroom that's right for you. You need to consider all the options and variations that are available, so you can come up with a plan that suits your needs and requirements, as well as meeting a realistic budget you can work to. It is vital to consider who will be using the room - will it be a busy space for the whole family, or a relaxing peaceful retreat?
It is a good idea to start with a scaled plan to help you work out the exact measurements of your bathroom and hence the space you have available. It is very easy to make a plan of the room yourself using graph paper. Cut out the items (such as a bath, wash basin and so on) that you will beincluding in your bathroom in scale with the room plan you make. Many bathroom companies feature these scaled plans in their catalogues or can often help you to plan and design a bathroom that suits all your requirements. They will also help you to work our realistic spaces for the areas you are designing - for instance, it is important to allow atleast 50cm of space infront of the wash basin and adequate elbow room on either side. Make sure you note down all the permanent fixtures on your plan, such as doors, windows, radiators and plumbing points. You can then work out how the bathroom features fit and work best within the space you have, trying out different option and variation.
Inspiration: 100 Bright Ideas for Bathrooms byTamsyn Weston
More bathroom decor ideas... Click here
Subscribe to:
Posts (Atom)